Star Spangled Banner Nails

4th of July nails! For these, I just did a regular french manicure using white and red. I then took masking tape and used a star shaped hole-punch to make a star shape, and then put the tape on the nails and painted blue over them. Make sure to immediately remove the tape after you put the polish over it, otherwise the lines can get screwed up. I finished up with my thin brush silver sparkle polish to go around the outside of the stars and between the red and white, and a clear top coat!
Black & Yellow Saran Wrap Nails
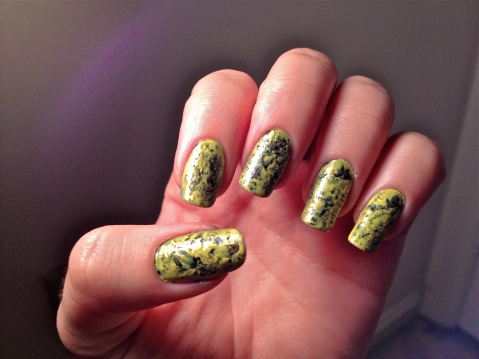
See previous saran wrap nails post on how to do this!

Saran Wrap Nails

Tried out a new technique for these! I painted a coat of silver polish and let it dry completely. I then painted a full coat of purple on one nail, and then took a small, bunched up ball of saran wrap and dabbed at the purple, exposing some of the silver and giving it this marble effect. Repeat on each nail one at a time and finish with a clear top coat!
Starry Night Nails

For these nails, I did a dark blue base coat. Then I took a star-shaped hole-punch and punched a hole in a piece of masking tape. I put the masking tape over the nail, centering the star, and then painted the star area gold. Same thing on all the other nails, and then a top coat.
Matte/Shiny Black/Grey French Tip

For these nails, I used a regular grey base coat and then put a matte top coat on it. I then did the tips with just a regular black for a matte/shiny contrast.
Christmas Crackle
 This is just red polish with silver crackle polish on top, and then green crackle polish on top of that!
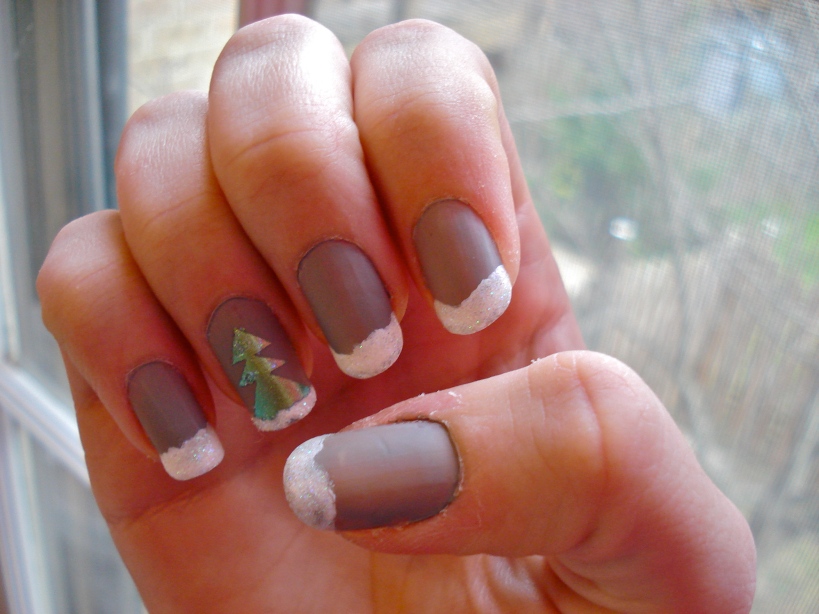
Winter Wonderland Nails
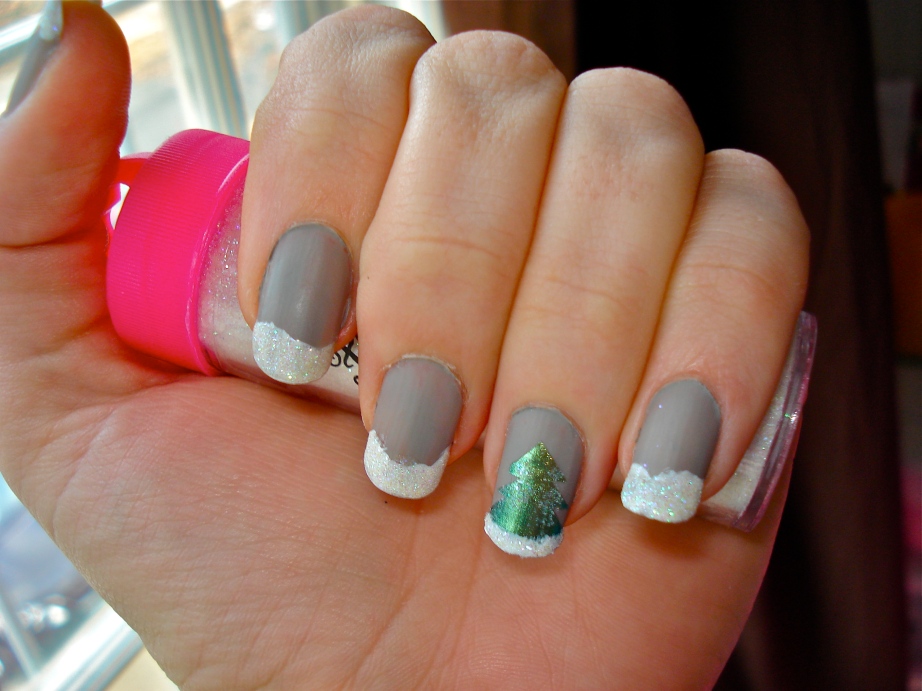
It may be 68 degrees here in DC, but it’s winter on my nails! This manicure was actually super easy to do. The best part is that the white tips are supposed to resemble mounds of snow, so they are not actually supposed to be straight.
I started out with gray polish and used a matte topcoat, which makes the tips stand out a little more.
Then I painted the white tips, just making them uneven-pretty hard to mess up. I didn’t do the ring fingers yet. I finished the tips by putting clear topcoat on them & dipping them in loose glitter to make them sparkle. Then I did the shiny topcoat only on the tip.
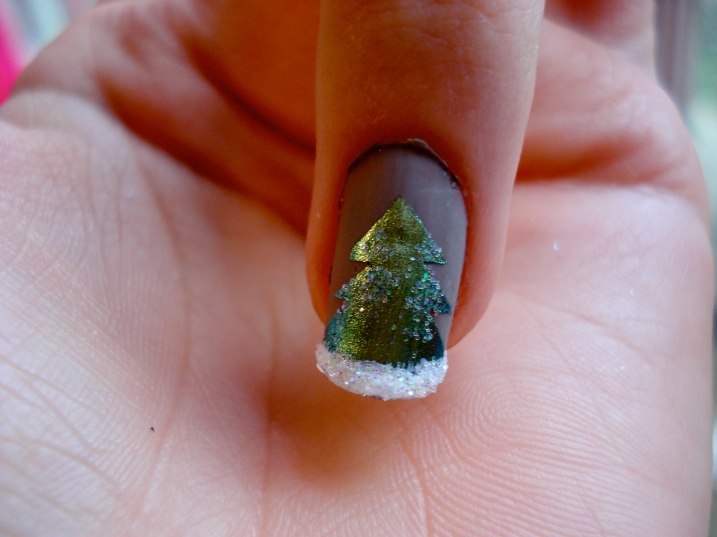
For the ring fingers, I used this tutorial for the tree, using scotch tape.

Once the tree was dry, I did a little white on the tips and then dipped them in glitter like the other nails. Finally, I used a toothpick to put a little bit of clear polish on the tree itself and then sprinkled the glitter on it to make it look like a little snow is on the tree.